

Introduction to Bubble.io: Getting Started with No-Code Development
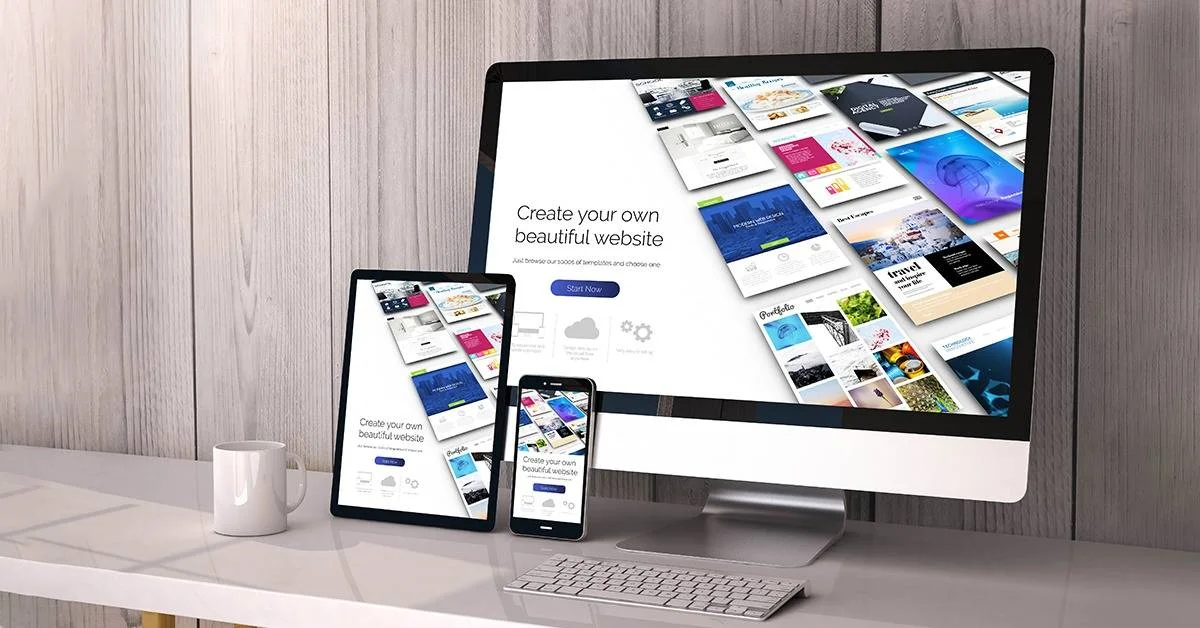
The app development industry has been revolutionized tremendously with the no-code development movement. Building apps has become more convenient than ever because of the power of no-code development platforms like Bubble.io; you no longer need a technical background or coding knowledge to build applications.
Bubble.io is a no-code development platform that allows you to design, build and deploy real-world applications using the visual user interface without coding knowledge. It enhances the building speed so you can quickly develop and launch an application at a fraction of the cost.
Whether you are an early-stage startup or a solo entrepreneur, using Bubble.io to build applications is a game-changer option for you to reduce development costs and time.
But where to start? This article will cover a step-by-step guide from accessing and setting up a development environment.
What is Bubble.io?
Bubble.io is a no-code development platform that combines the power of visual programming and a web development framework along with cloud infrastructure. It gives us a visual application editor interface to design, develop and host fully functional web applications without writing a single line of code.
Basically, you use the visual application editor interface to create your applications, while the cloud platform enables you to host and run them. The Bubble.io application editor is accessed directly in the browser, so you don’t need to download anything to start application development.
The Bubble.io application editor is open-ended, which means it works like a traditional programming language, so you don’t have to limit yourself to a few possibilities. Instead, you can combine different data and logic operations to create an extremely complex application without much hassle.
The list below shows the power of the Bubble.io platform without going into the core of it:
- Creating user, and admin accounts
- Database connectivity to save, modify, delete and retrieve data
- Real-time updates
- External Services connectivity using API such as (payment gateways, Data Sources)
- Creating Responsive applications
- Plugins and custom development support
What is visual programming?
Visual programming is what it sounds like. It allows us to build applications by dragging and clicking components using the graphical interface. Visual programming is a concept in computer programing that enables software or application development using graphical representations or visual elements instead of manually writing lines of code.
Visual programming uses the visual application editor interface to build applications using the icons and drag-and-drop components instead of only relying on traditional text-based programming languages such as JavaScript or Python.
Don’t misinterpret the visual programming or bubble.io with the general website builders because most builders only use the basic template to build applications, but bubble.io allows you to use to drag objects such as text, input or buttons with complete configuration and customization.
Key features of visual programming include:
- Drag-and-Drop Visual Interface
- No-Code Development
- Interactivity
- Rapid Prototyping
- Accessibility
Bubble.io: Capabilities and Limitations
Bubble.io is an incredibly powerful no-code development platform that allows you to build applications without writing a single line of code. It provides many functionalities and features to build applications easily and quickly. It offers hundreds of valuable capabilities, but it still has its limitations.
Now we will explore the capabilities and limitations of bubble.io So that you can make an informed decision before developing applications using it.
Capabilities of Bubble.io:
- A powerful visual interface with drag-and-drop functionality.
- Robust database and its management
- Workflow and Logic Building with strong dynamic interactions
- Support for responsive design
- Support for Integration of external services and APIs
- Secure user authentication and authorization
- In-built deployment and hosting support
- Bubble.io OpenAI ChatGPT support and integration
Limitations of Bubble.io:
- The offline functionality of bubble.io is limited.
- Migrating to other technologies will be challenging because the application is strongly tied to the platform.
- Complex Learning Curve for Intricate Apps.
- Bubble.io allows custom coding but has limitations when integrating highly specialized functionalities.
- Strong possibility of weak security because of the cloud-based platform
Sign up for Bubble.io
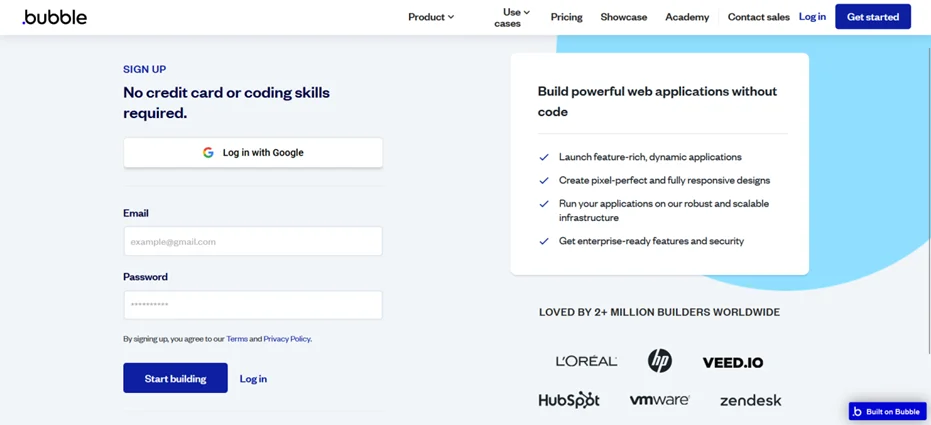
Creating an account on Bubble.io is required to start the development of the applications, so open Bubble.io, where you can create an account by entering your Email and Password, or you can directly create an account using a Google account.
When you open the Bubble.io website, you can see that it says, “No credit card or coding skills required”, so you can create an account without either of those things.
Getting Started with Bubble.io
When you complete the account creation process and login inside bubble.io, you will see the interface like the screenshot below, where you will see the navigation menu with the Welcome, Resource and Support options.

The “Get Started” Button is used to start the application development when you click on it. Next, it will follow four steps to complete the basic project configuration and environment set-up.
The First step asks you to upload the favicon and write the name of your website, which will later be available on your browser tab.

When you enter the details required by the first step, you must click “Next Step” to move forward with the project configuration.
The Second step allows you to set up the font family, which is later automatically applied to all elements by default.

After choosing your font, click “Next Step” to proceed with the project configuration.
The Third step allows you to set all types of colours for your application that are applied to all elements by default.
Basically, it enables us to set primary colour, primary contrast, Text colour, background colour, and many more.
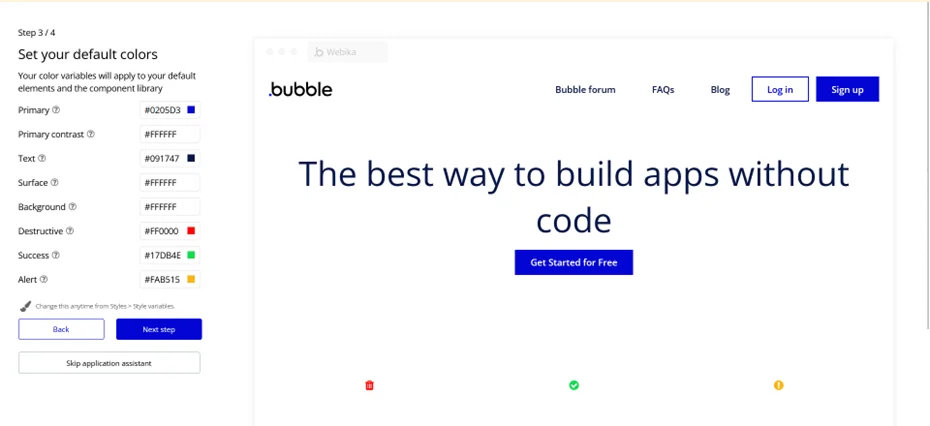
When you finish setting up all the colours, you can click “Next Step” to move forward.
The last and fourth step allows you to add plugins to use later in the application development. Installing and adding plugins is optional; we can do it later.

After you finish the fourth and last step, click on the “Get Started Building” Button to open the application editor and start the development of the application.
The above image illustrates the bubble.io application editor, which contains all different sections for different work and purposes, so now we will go through each section to understand its uses.
The Application Editor
The Bubble.io Application Editor allows you to design, develop, maintain and deploy applications without writing a single line of code. The Application Editor interface is primarily structured around seven tabs, including all the key tools, features and functionalities to build applications.
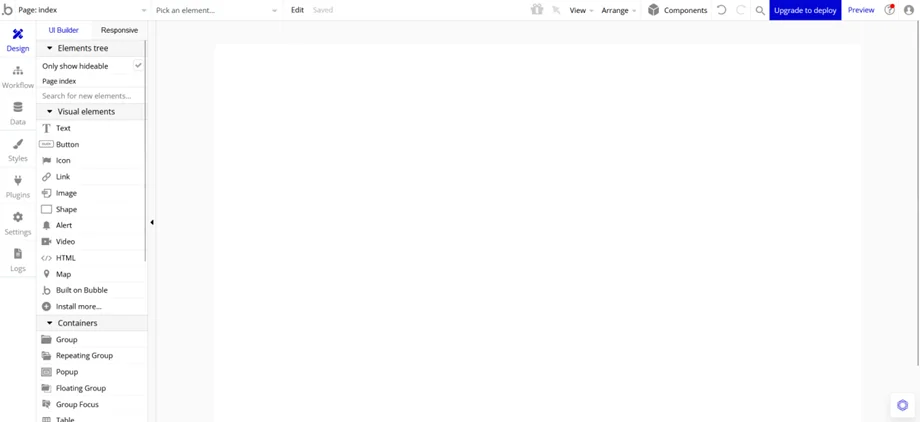
All seven tools you can access from the left navigation of the screen that looks like the below image:

Let’s talk about each tab and understand its key features and functionality.
1. Design Tab
The Design Tab allows you to design your application interface. It allows you to develop and customize your app’s UI (User Interface) and Responsiveness. This tab provides many built-in elements such as buttons, input, text and many more to add to your web page. All you have to do is click on the icon of the element you want to add and again draw it on the page where you want to add it.
Double-clicking on the added element will reveal a prompt containing a property editor from which you can customize the element look.

2. Workflow Tab
The Workflow tab allows you to define workflows to program your page accordingly. The created workflows look like boxes and represent events.
When you click on the already created events, it reveals a prompt containing a property editor to define and customize the different fields of the event.

3. Data Tab
The Data Tab allows you to view your database structure and modify it. It allows you to Create, manage, and delete all types of data your application uses. It also lets you define the privacy rules to ensure secure data communication for all users.

4. Styles Tab
The Styles tab allows you to define styles for all types of elements so you can have a consistent and appealing interface. It will enable you to customize the appearance and layout of all the elements, and also you can define style variables to use for applying styles to the elements.
The Styles Tab enables you to change your styles of elements so you can quickly change your UI theme.

5. Plugins Tab
The plugins tab allows you to install and add plugins within your applications to expand and extend bubble.io core functionalities and features.
You have the freedom to install plugins as much as you want to expand the functionalities of your application, such as Stripe for payment gateway and API connector to define your own APIs.

6. Settings Tab
The settings tab allows you to control and manage application subscription, Domain, Email, SEO, API, Sub apps and versions.
This tab enables a wide range of settings, such as adding password protection, Setting up Domain and SSL and many more.

7. Logs Tab
The Logs tab lets you monitor and test your application once the app is live. Log saving during test mode helps identify and resolve event and workflow issues.

Each tab of the application editor plays an essential role, and combining all the tabs allows us to design, develop, maintain and deploy an application.
Conclusion
In this article, we’ve covered Bubble.io, from accessing it to understanding its application editor. We have even explored each part of the application editor in detail to understand their use.
Bubble.io is a powerful no-code platform that can become a strong and faster option for building applications without using a single line of code. The interface of Bubble.io is quite simple and user-friendly, so the non-technical person also can build applications.
Are you looking for a Bubble.io development agency to boost your application development with exceptional design and seamless experience? Look no further! We at Delphin Technologies provide Bubble.io development services to bring your idea into reality with the help of our Bubble.io experts. Our team is experienced and skilled in creating performance-focused, visually appealing applications using Bubble.io.


Grovy Optiva, A-5, Block-A Sector-68,
Noida-201301 Uttar Pradesh, India

712 H St NESte 1735, City: Washington, State: DC, ZIP Code: 20002

Compass Building, Al Shohada Road, Al Hamra Industrial Zone Ras Al Khaimah, United Arab Emirates

Unit 1603, 16th Floor, The L. Plaza, 367 - 375 Queen’s Road Central, Sheung Wan, Hong Kong